
Approval and signature / E-Signature
Create and publish E-Signature forms
Upload a business document, choose the signing flow, place signer fields, and publish a reusable E-Signature form in Nexia.
An E-Signature form fixes the source document, signer structure, field placement, and signing flow that future requests will use. This guide covers form authoring and publication. To send, track, or complete a request after publication, use the separate request guide.
Select a screenshot to open the original image in a new tab. Organizations, names and records in the examples are Demo data; use the corresponding information for your own work.
Before you start
- Sign in to Nexia with E-Signature form-management authority and select the owning Legal Entity.
- Prepare the final business document. Nexia accepts PDF, Word, HWP, and HWPX source files; PDF, HWP, and HWPX sources are converted to a safe PDF.
- Decide how many people must sign, whether they may sign in any order, and which fields each person must complete.
- Confirm the effective date and the business owner who approved the form for use.
Publishing freezes the form's document, signer routing, fields, and policy. Review the complete draft before publishing it.
Open E-Signature Templates
Open E-Signature → E-Signature Templates. The list shows each form's name, version, type, scope, effective date, and lifecycle status. Choose Create Template.
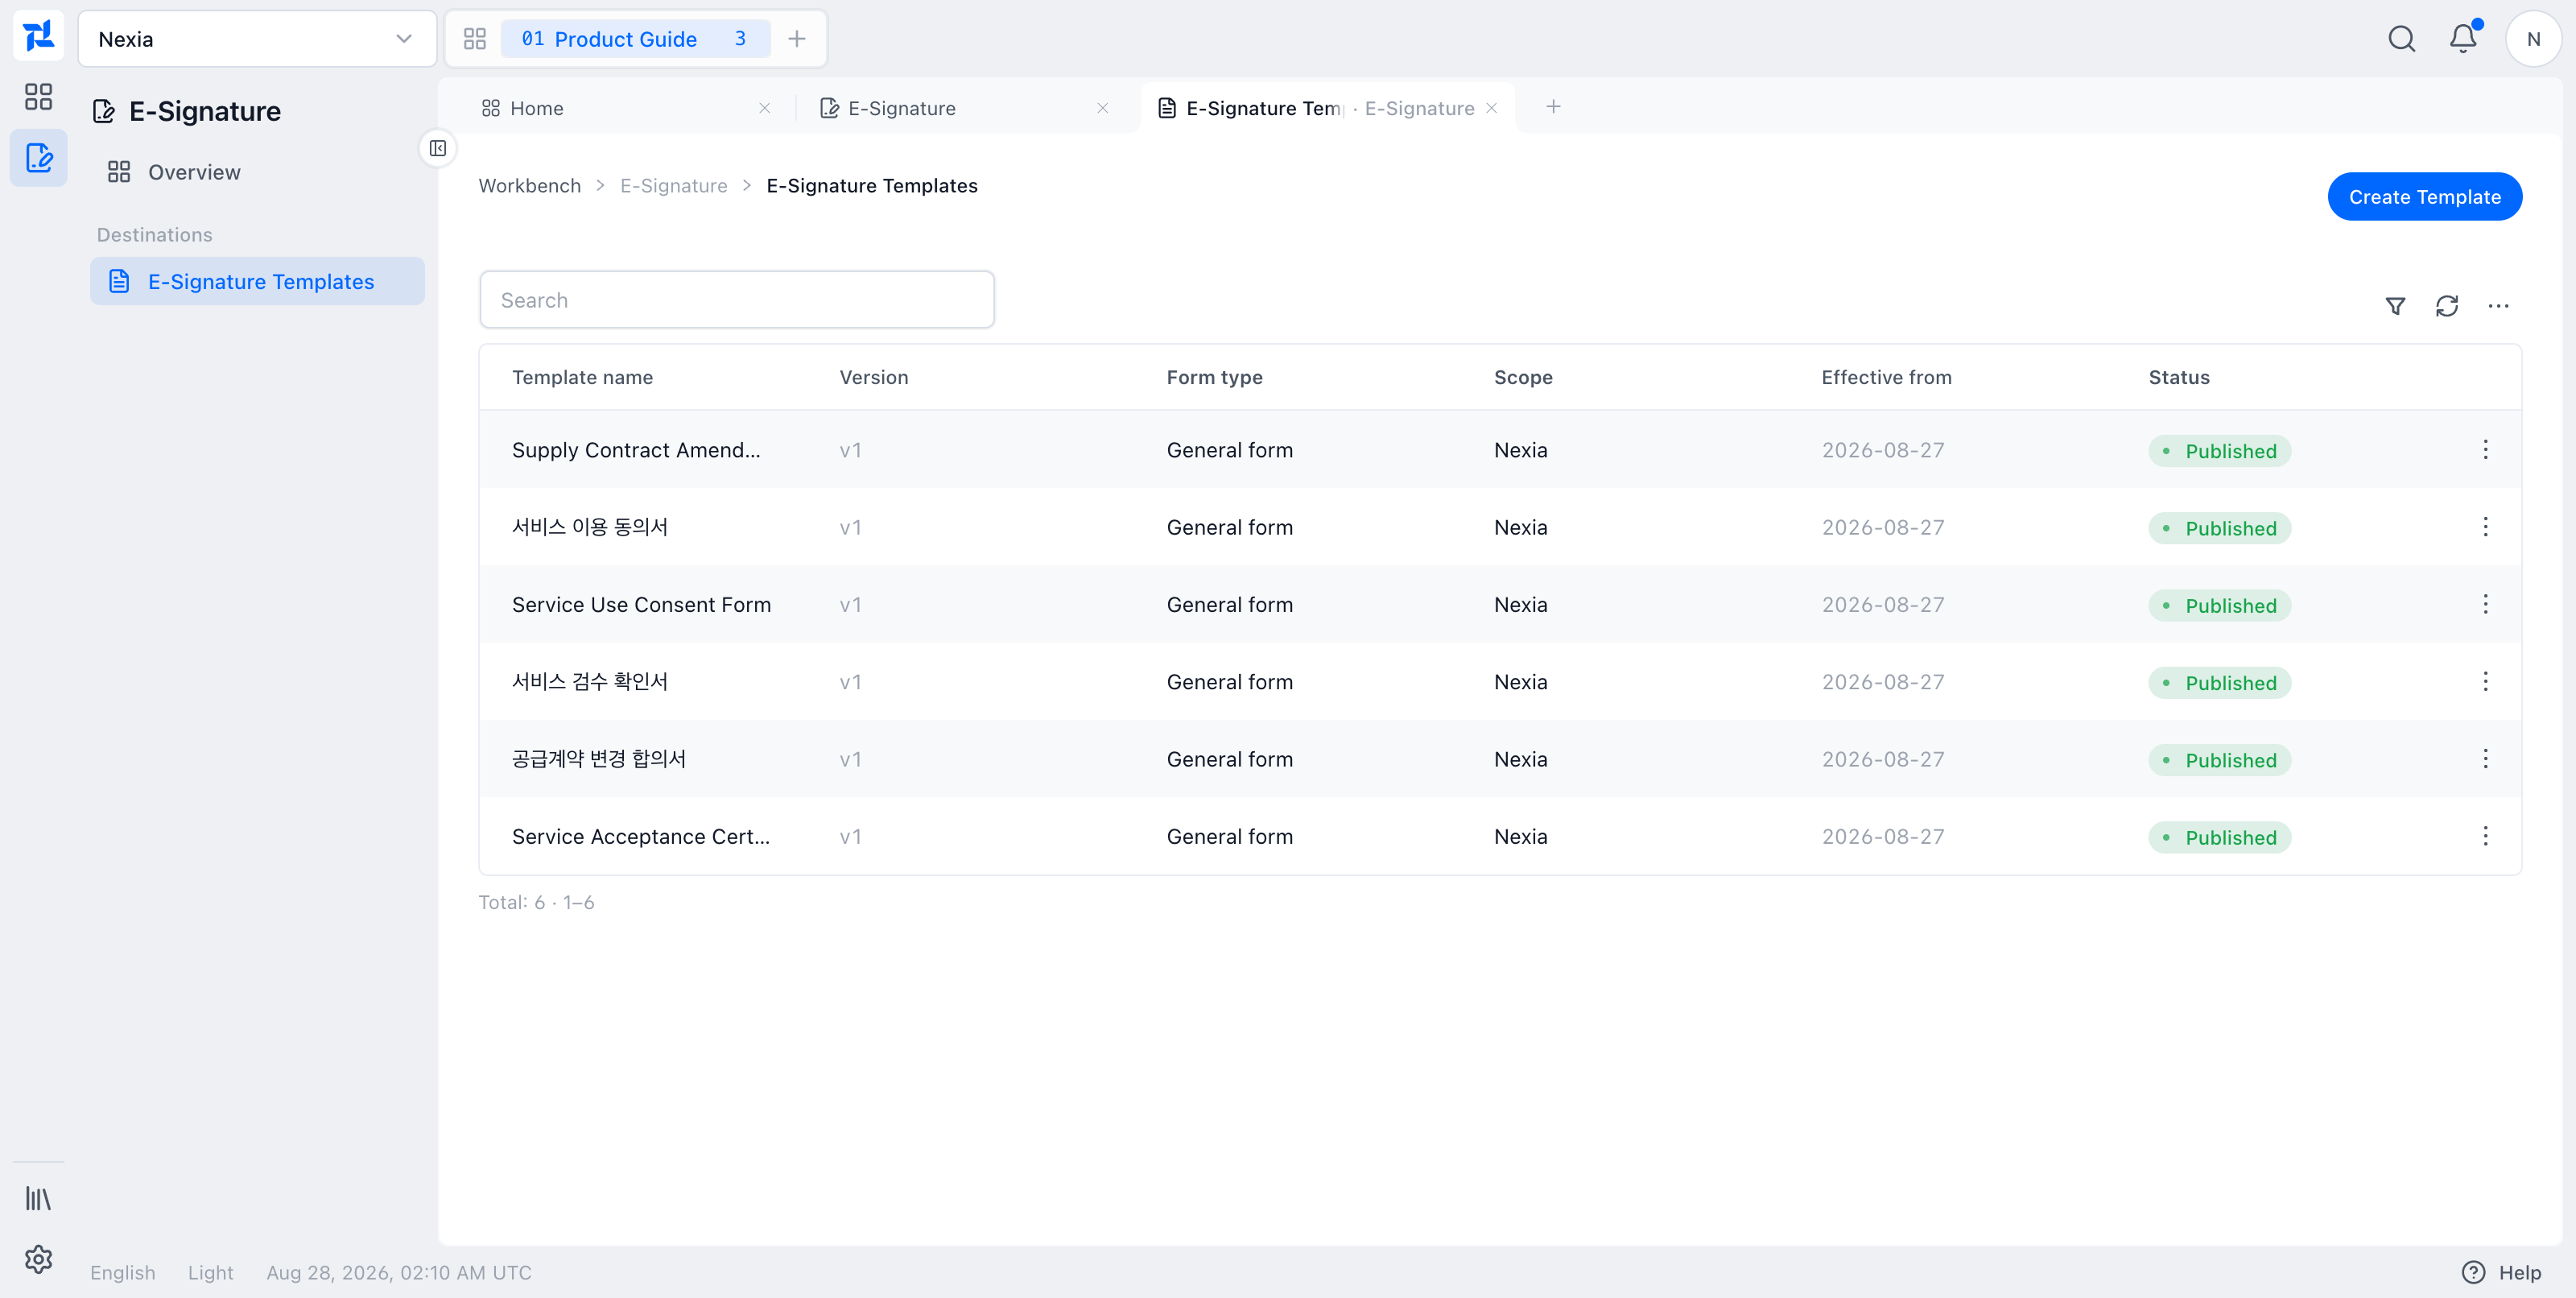
Use the list to distinguish a working Draft from a Published version that requesters can use.
Add form details and the source file
Enter the form name, scope, form type, effective date, and a description that identifies its business use. Upload the approved source file and wait until the source status is Ready.
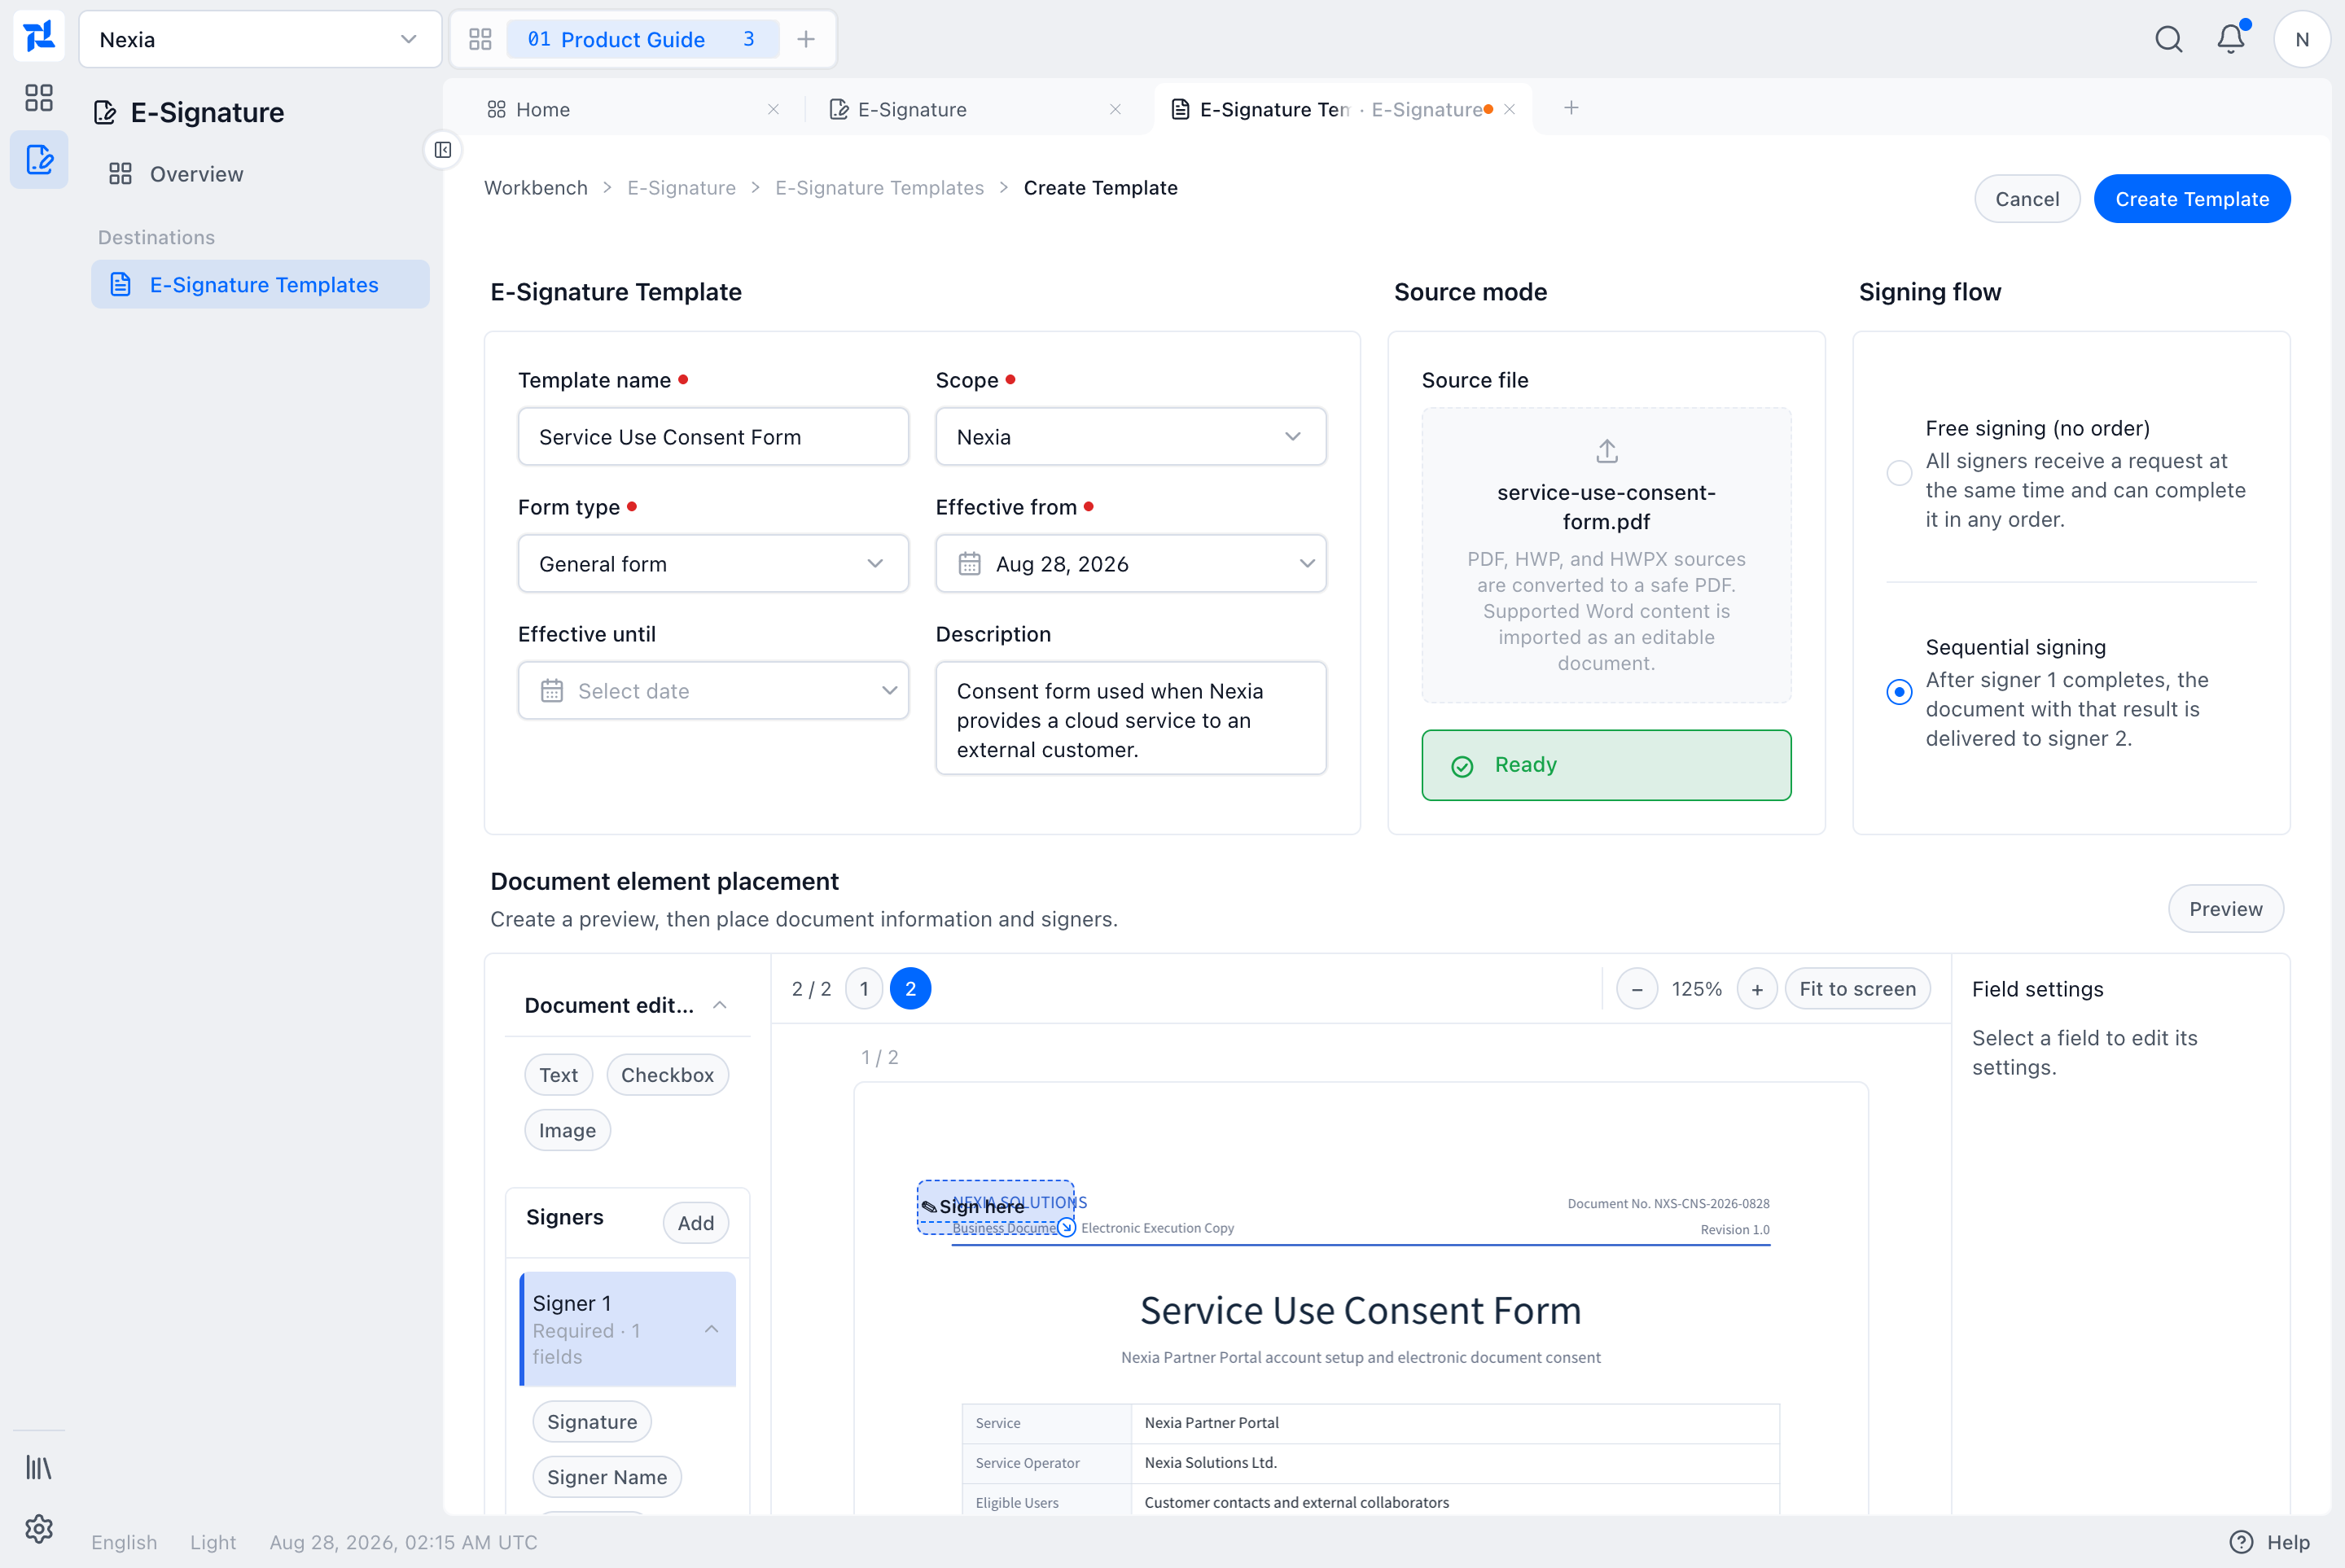
Check the generated pages rather than relying only on the source filename. Conversion can affect pagination, so the server-generated preview is the authoritative document used for field placement.
Choose the signing flow
Choose one signing flow before arranging signer fields.
- Free signing (no order) sends invitations to all signers together. They may finish in any order.
- Sequential signing sends the document to signer 2 only after signer 1's result has been applied.
For sequential signing, give every signer a unique position and review the final order. The order becomes part of every request created from this form.
Configure signer roles
In Document element placement, choose Add in the Signers panel for each additional signer. Check who each signer slot represents and the order required by the selected signing flow.
Place fields for each signer
Place each signer’s fields on the exact PDF pages.
- Add at least one required Signature field for every required signer.
- Add Signer Name, Signed At, text, checkbox, date, or select-list fields when the document requires them.
- Drag and resize each field over its intended area on the PDF.
- Use Field settings to add a short input guide where the expected value is not obvious.
- In Signer assignments, keep Choose for each request when the requester should select the person later, or use an available fixed source when the form requires it.
The following image is before position correction. Do not keep signature fields over the logo or title. Go to the page containing the intended signature area, move the fields there, and check each assignee and required setting.
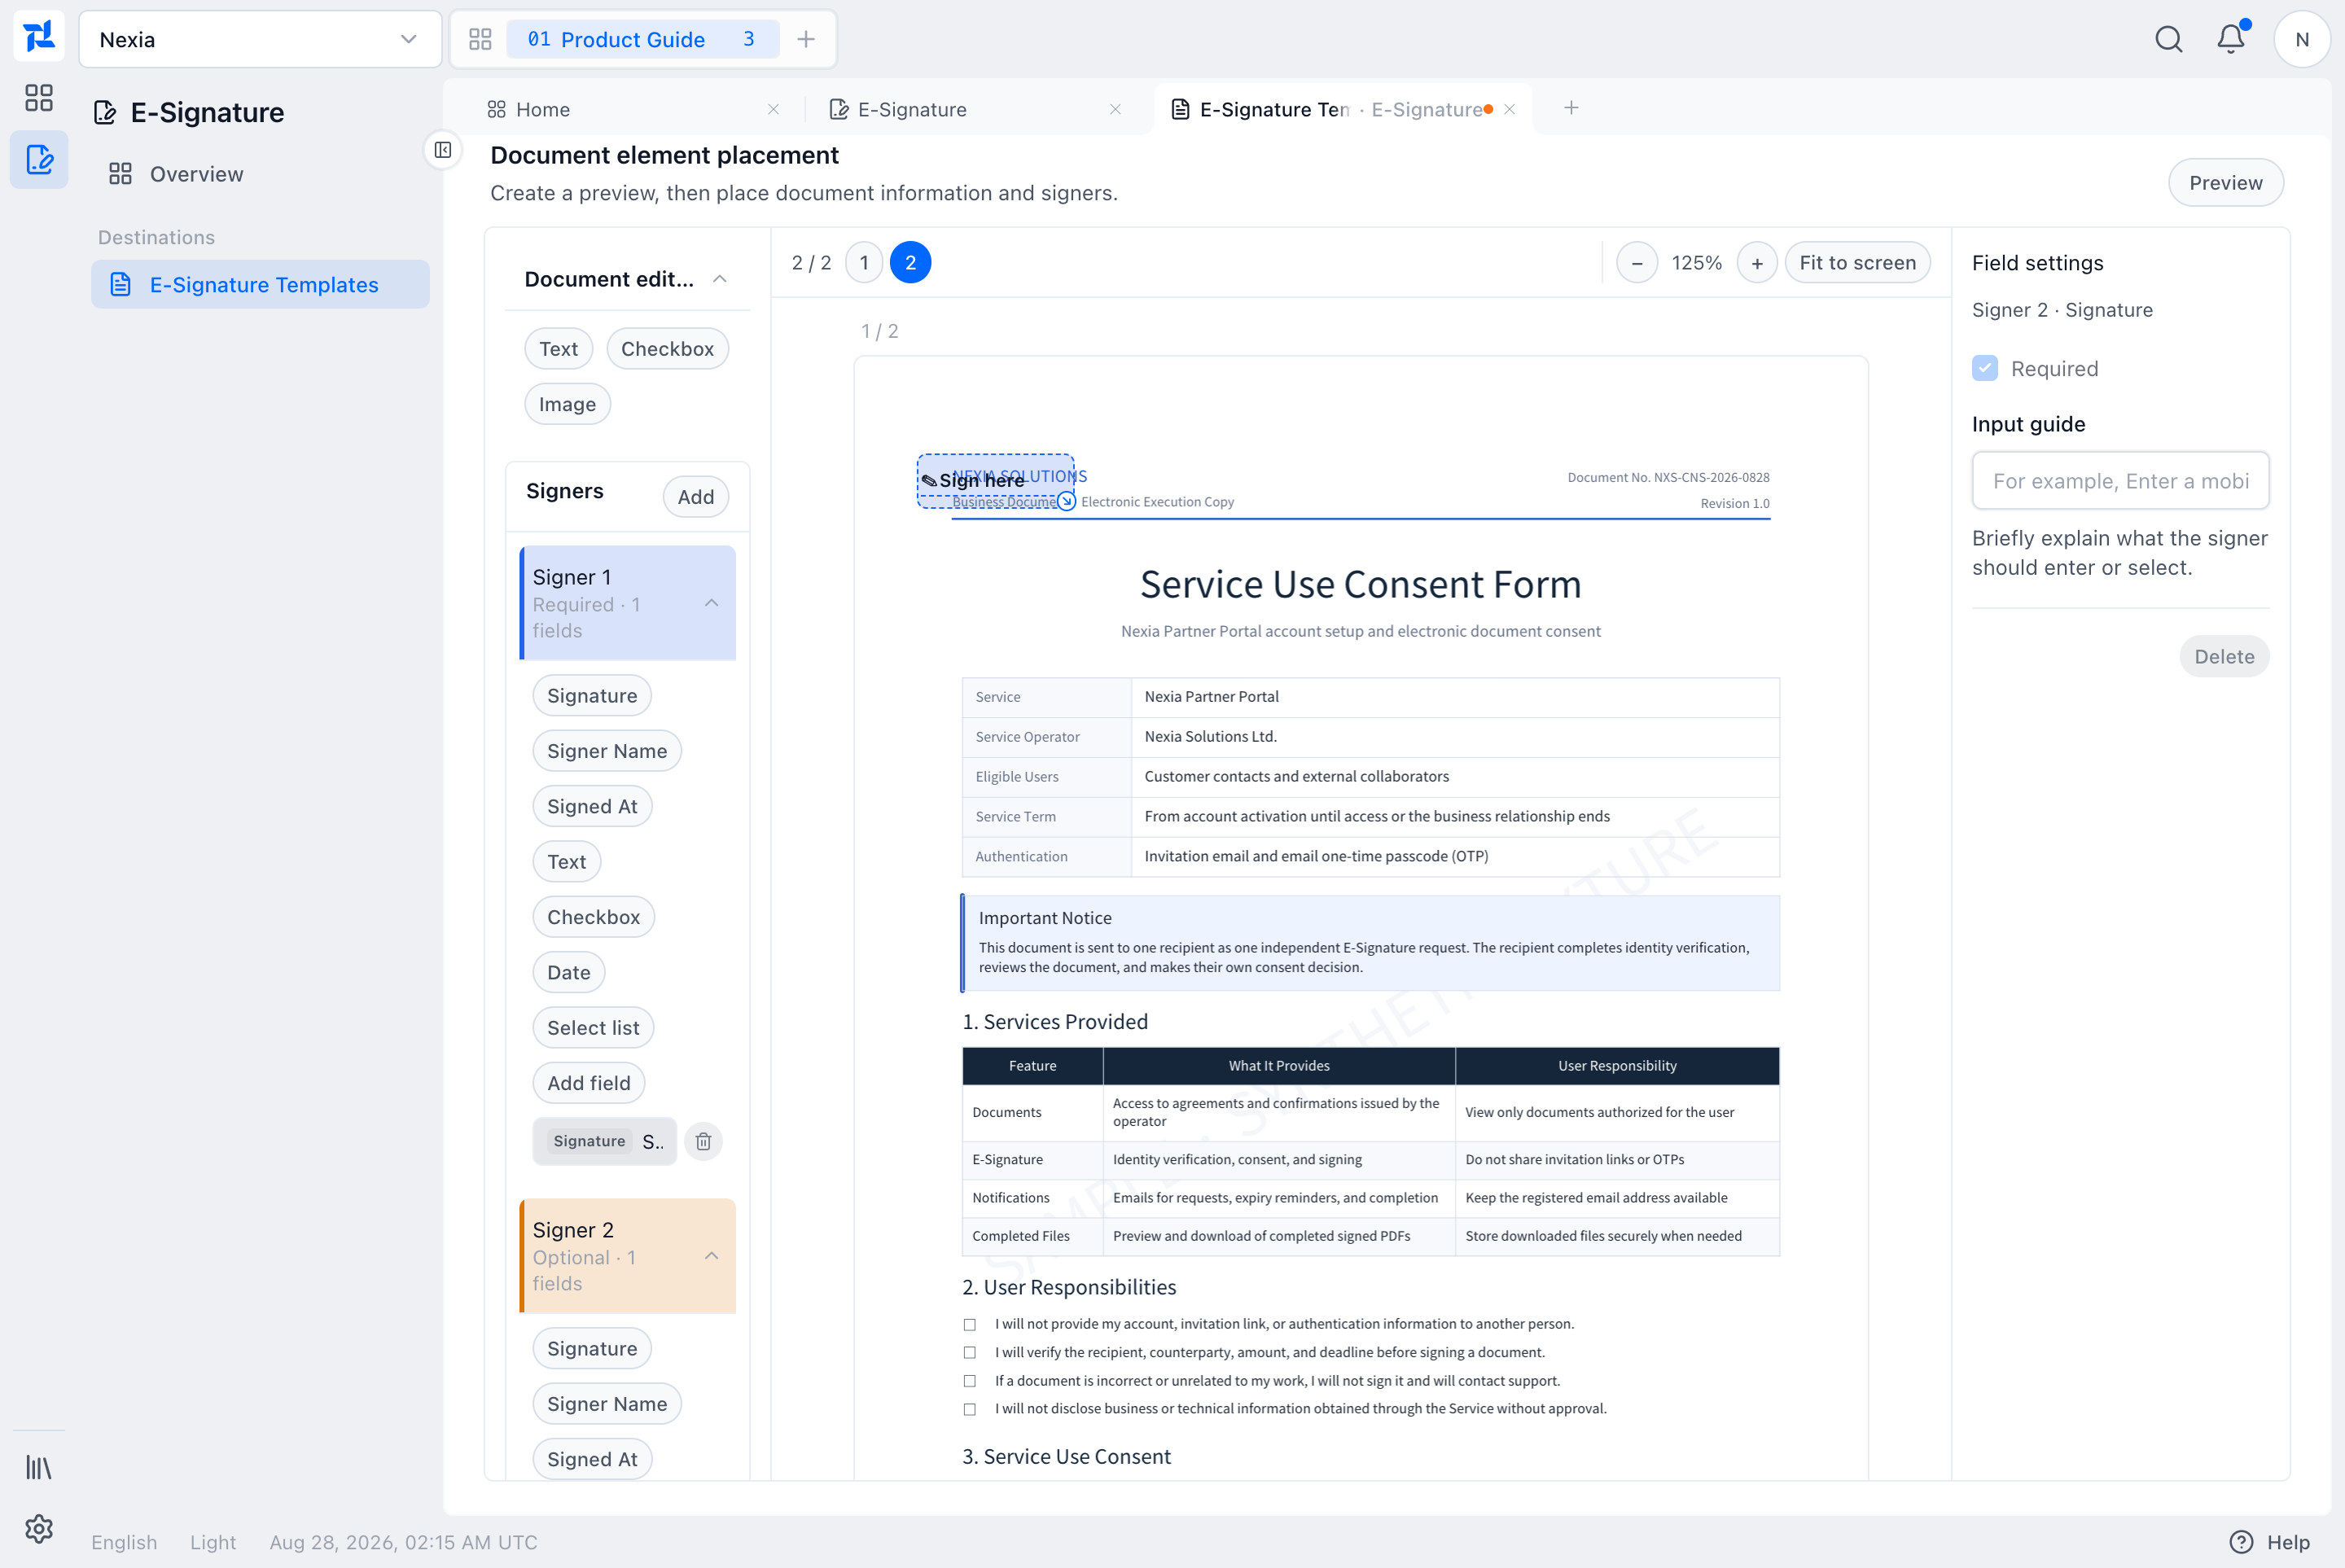
Review every page at Fit to screen and at a readable zoom. A required field outside the visible signing area can block completion even when the rest of the request is correct.
Check the final position at the actual signature area
The following recipient signing screen is from the separate request guide. It shows a signature in the document’s intended signing area, clear of the body and logo. It is a position reference, not the template editor or a published result of the two-signer draft above.
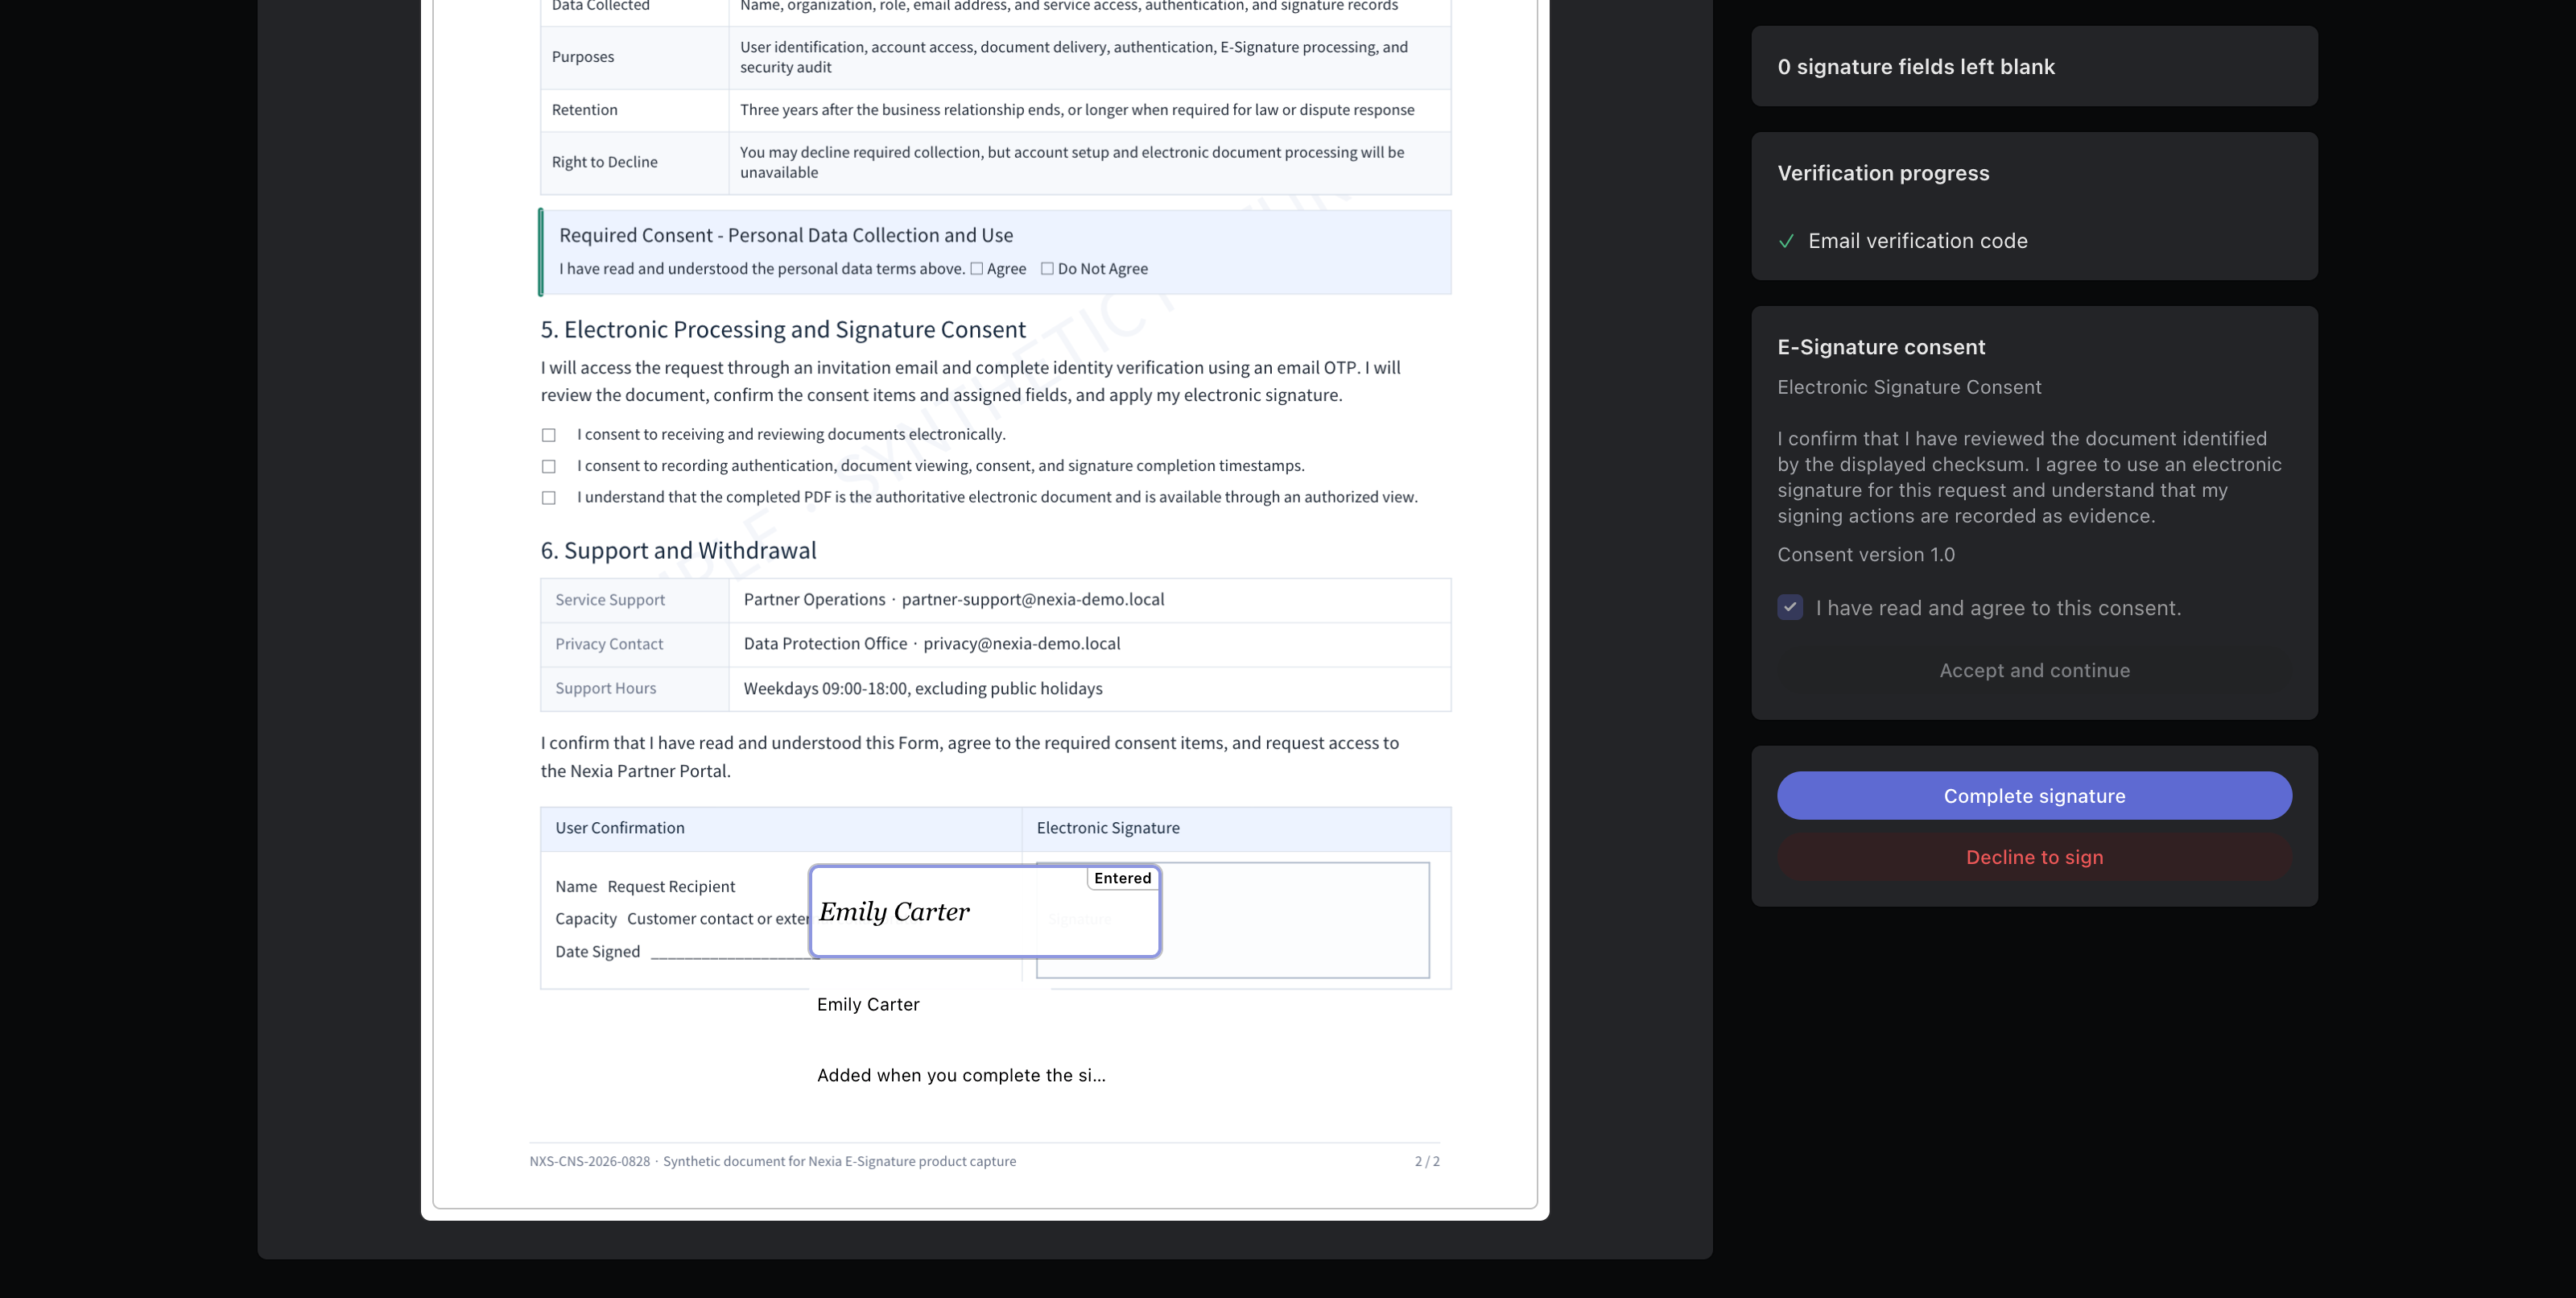
In the template, check every field’s signer, page and position before saving. A two-signer form needs an appropriate area for each signer, without overlapping fields.
Create, review, and publish the form
Choose Create Template to save the form as a draft.
Preview and publish
Open the saved draft and verify:
- the source PDF, page count, and effective date;
- the form scope and description;
- every required signer and signature field;
- the free or sequential signing flow; and
- the signer order and assignment source.
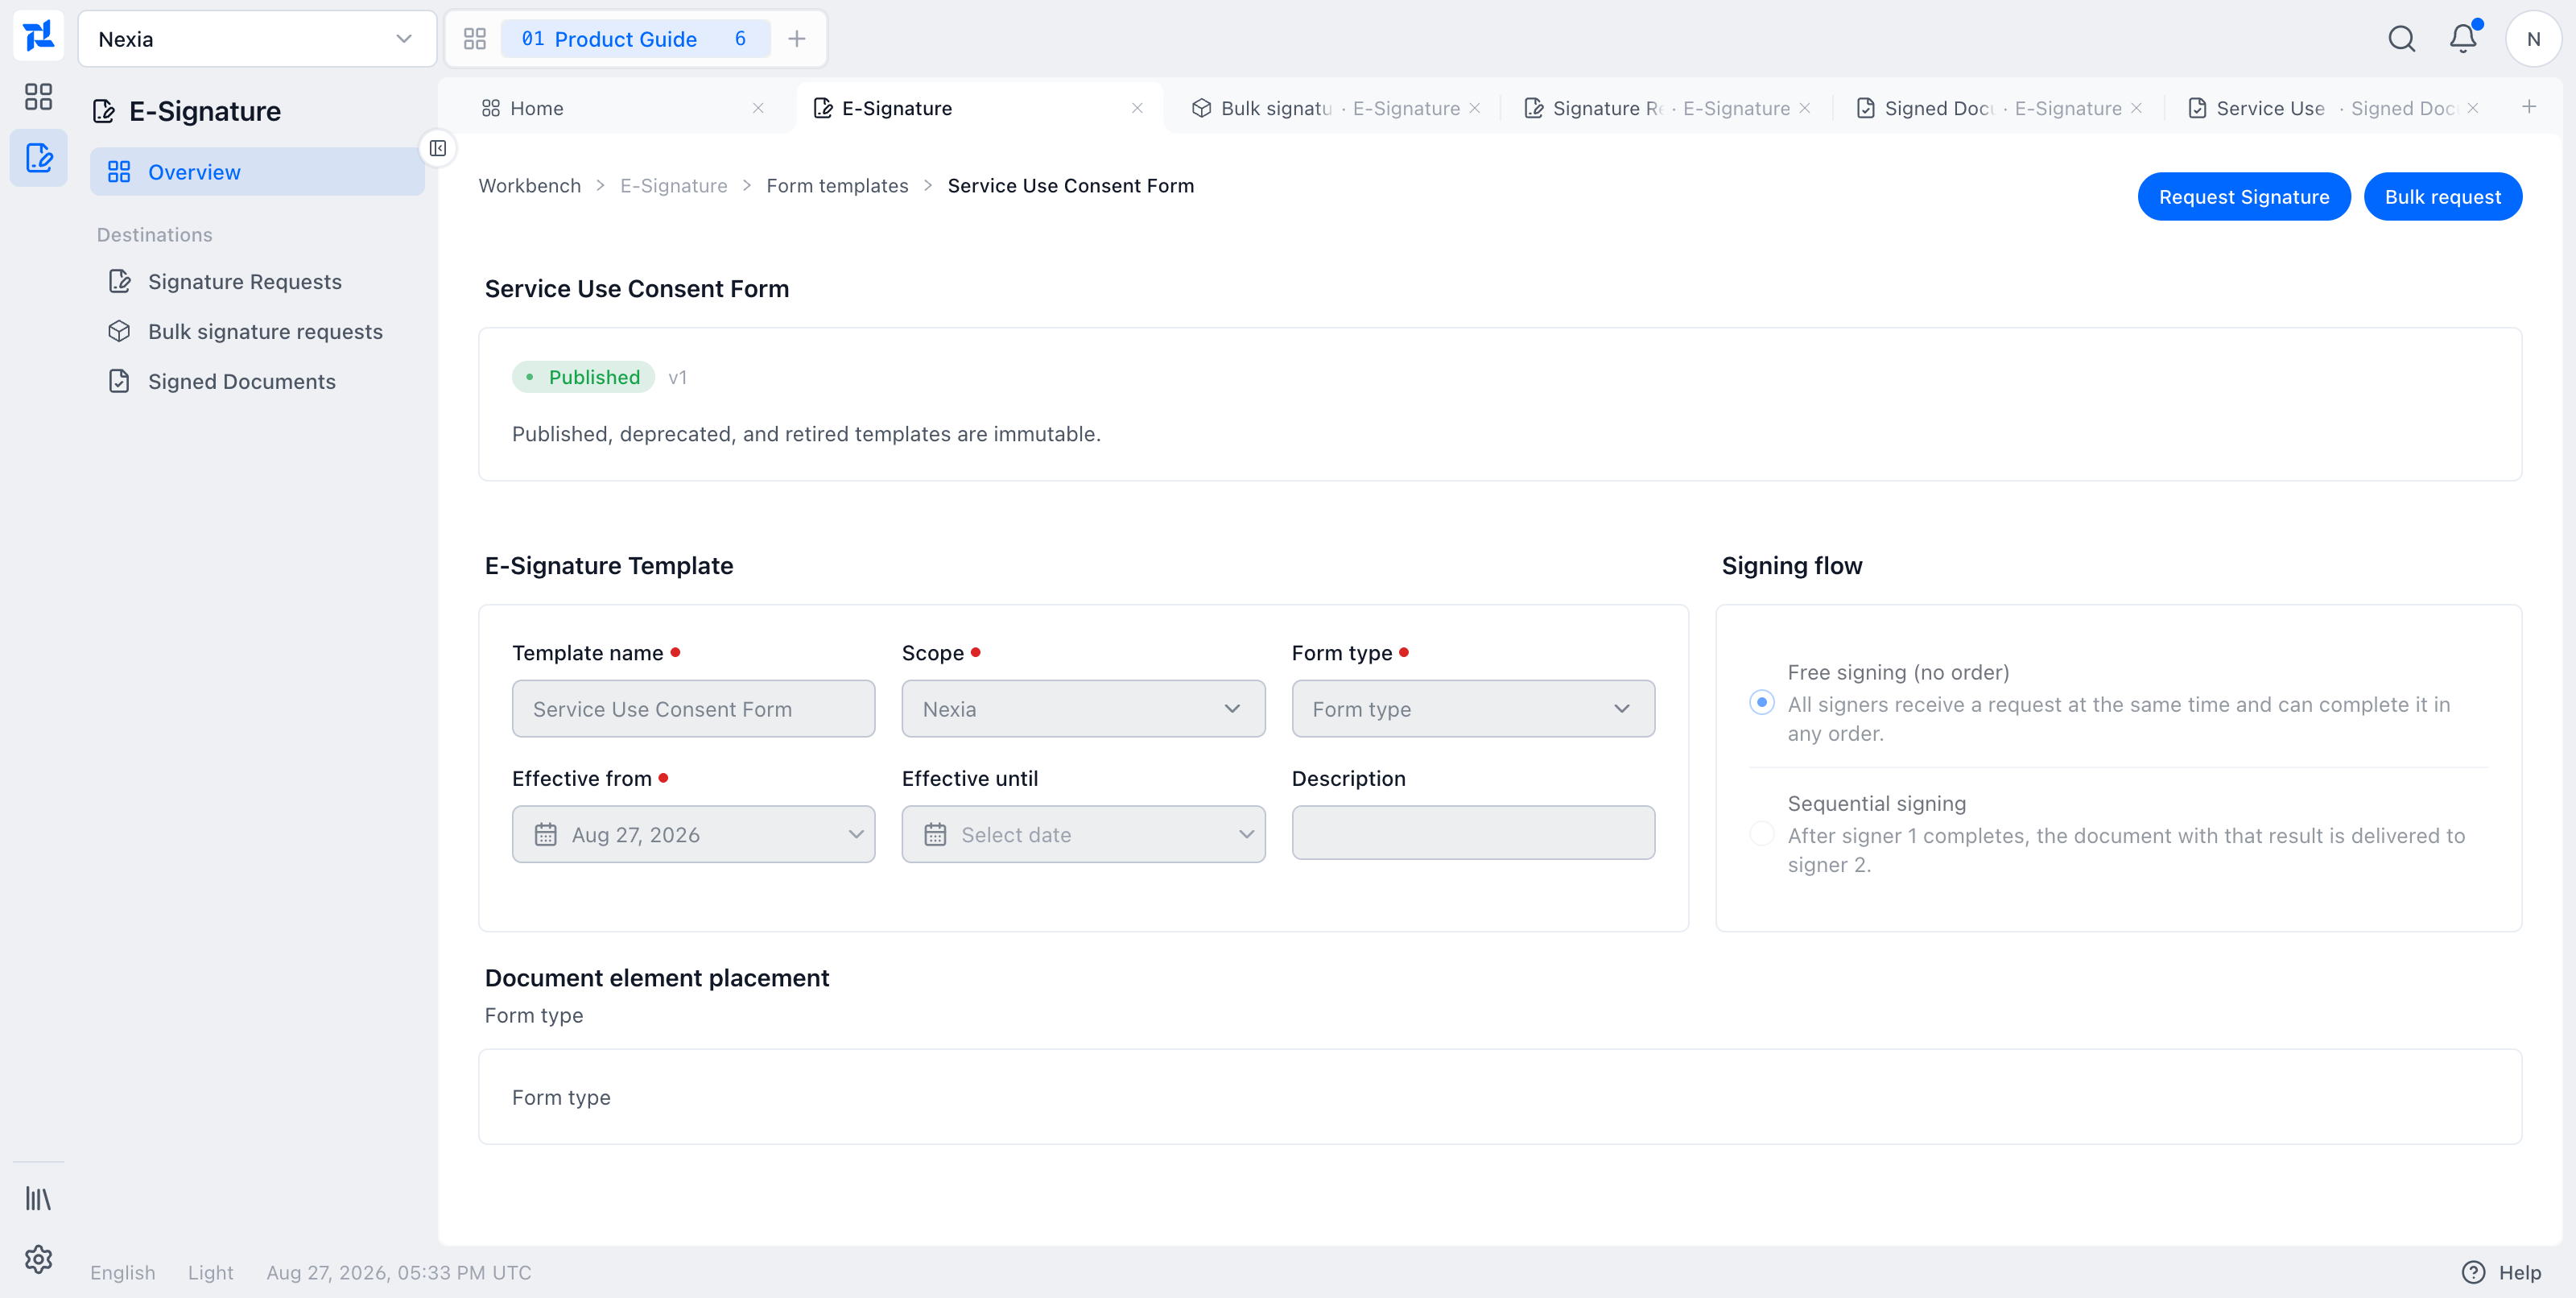
Choose Publish only after this review. The status changes to Published, and authorized users can start a single Request Signature or a Bulk request from the form.
Change a published form safely
Published, deprecated, and retired forms are immutable. If the document, fields, or routing must change, choose Create New Version, edit the new draft, review it, and publish that successor. Existing requests continue to reference the version from which they were created.
Deprecate a form when requesters need time to move to its successor. Retire it when it must no longer be used for new requests.
Troubleshooting
- If E-Signature Templates or Create Template is absent, check the selected Legal Entity and your form-management authority.
- If the source remains in preparation, wait for conversion to finish and then generate the preview again.
- If publishing is unavailable, check the effective date, source readiness, required signature fields, signer assignments, and sequential order.
- If a field is on the wrong page, select the correct page before placing it or use Find in document from the field controls.
- If a published form is wrong, do not reuse it for new work; create a new version and publish the corrected draft.
Learn more
More guides for this capability
Nexia Cloud OS
Create and publish E-Signature forms
Build a governed E-Signature form from a real PDF and publish it for single and bulk requests.